Showing posts with label embossing paste. Show all posts

May 22, 2015

Sweet Stamp Shop May Release


 Hey there! Long time no see, eh?? Welcome welcome! Today I wanted to show you a little bit how I made this card here for this months Sweet Stamp Shop release.

Here is the card:


I started by doing some mask stamping around this little coffee guy here. The HAPPY sentiment is nice and big so it was easy to just ink up the H first and then move onto the PPY after. I colored in the letters using Copics in a bit of a gradient.

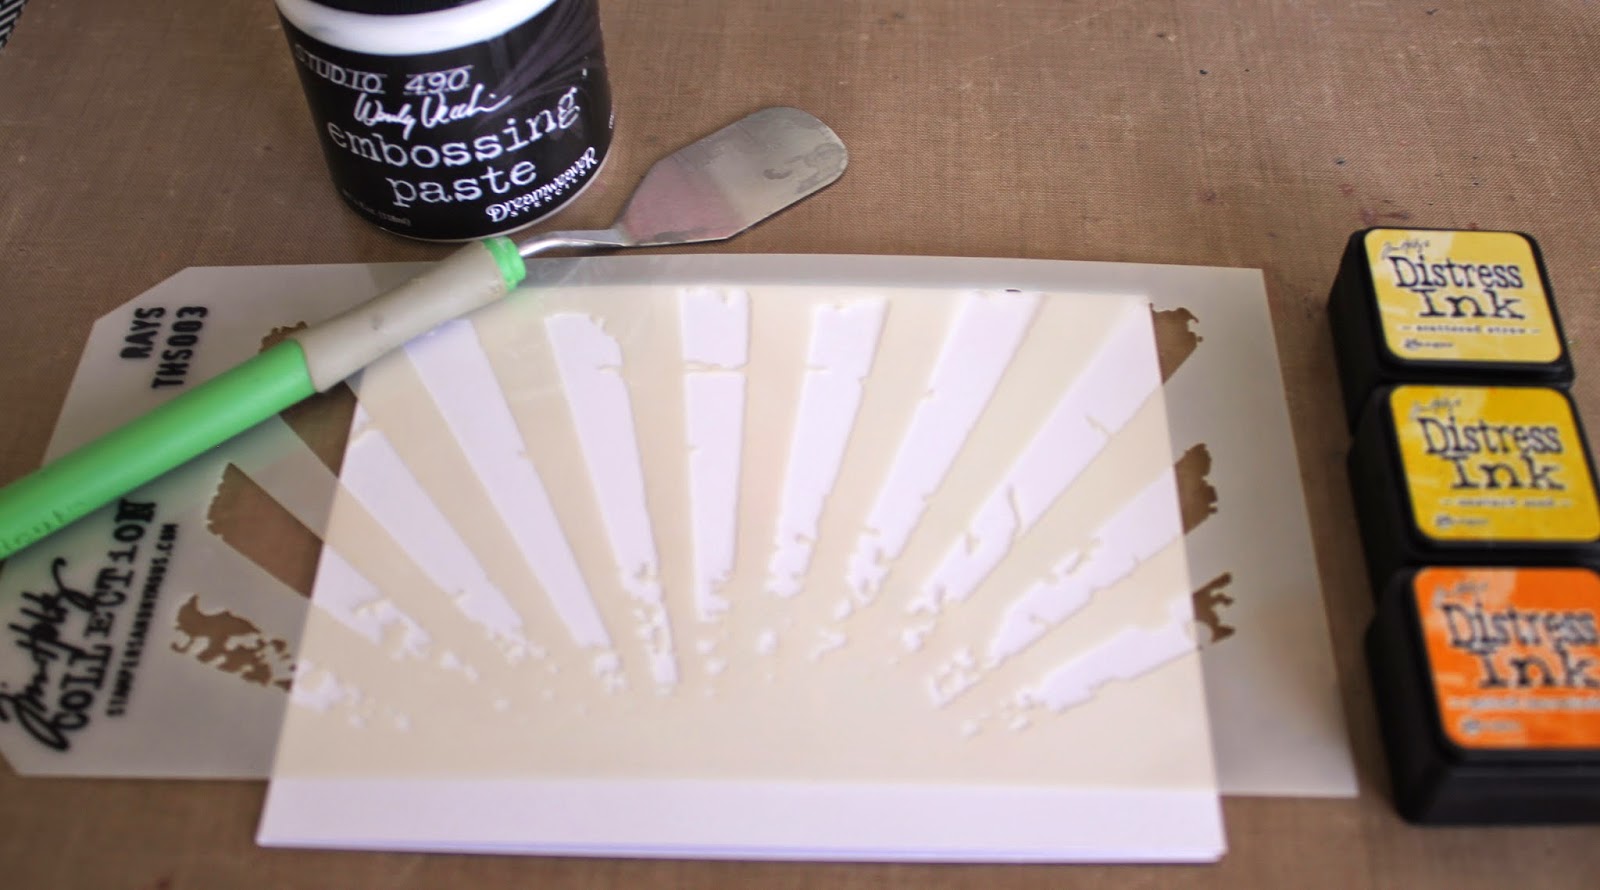
Next I laid down this Tim Holtz stencil and mixed up three different colours of embossing paste using some Distress Inks. I smeared it around on my craft sheet that you see there. That thing is a wonder! I love it so much. Kind of wish I could cover my whole desk in it.

Nexxt I started at the drakes and smeared in the paste at the bottom being careful not to go too high because I wanted the color to grade up. I then applied the next two colours. 


Reallyl the hardest part about making this card was waiting for it to dry!! That is actually why I then covered it with some Glitter embossing powder and heat set it all. Made dry up nice and fast.


And there you have it!! Have you check out the Sweet Stamp Shop store? All the goods are there ready for you to buy. Go take a look!

Thanks for stopping by!
xoxo
k

Mar 20, 2015

AWDML: White on white designing

I'm over at A Walk Down Memory Lane blog sharing a card using some white embossing paste on white card stock. If you have never used embossing paste, but you are curious about it, head on over by clicking HERE! See what it can do for you. I love the look and there really are so many looks you can get from it. It makes a nice subtle background, like on my card here. OR it can also be the star of the show like others you may have seen. You can search around the AWDML blog to see other examples of it.

Anyway, you can also purchase some of that paste (and a stencil or two) from the AWDML store and check it out yourself. Its so much fun, I'm pretty sure you will be happy you did!

Here's a little close up:

Thanks for checking in with me today. I hope you have a good one!!
xoxo
k

Mar 9, 2015

Stamping with Crafty Friend Jill Hawkins!!

Hey there! It's a Monday, and what better way to start off the week, than with a card! I wanted to share with you a little number that I made up a few months ago. You might remember the Re-Mix challenge they had over at PC Magazine for a publication call? Well, you were supposed to choose a crafty friend to work with. One of you makes a card and the other re-mixes the idea and makes a card as well.  

Well, my special crafty friend Jill Hawkins over at Fastest Turtle joined with me to make some card magic together. Now let me just say, Jill is a gem! She is so kind, and generous and FUNNY! She just cracks me up all the time. I loved working with her. Her style is fun and fresh and she does really intricate work. Every time I see something of hers I go, "MAN! That is awesome!"  I was so happy she was willing to be my partner. And wouldn't you know, we made cards that got picked up for publication! YAY! (Too bad PC Mag had to shut down before actually using them. Boo :(

So today to start our week out right, Jill and I are sharing the cards we made. Here is the first one. Some spotlight stamping:


This started as a die cut water-colour panel. I stamped the images with coloured ink and then spritzed them with water. I then stamped the background in varying greys and then splattered the whole thing with some gold spray mist.

And here is the second card using some coloured embossing paste and a stencil. This stencil is definitely my favourite! All the inks I used to tint the embossing paste with are Distress Inks. I love all these colours together.  The sentiment is from Hero Arts which I covered with a healthy dose of Glossy Accents.


And actually, you get to see a little bonus card. This card was originally different.... Here is the first attempt I made when I used water-colour and the stencil together (A technique you can learn from the Online Card Classes: Watercolor for Cardmakers). I used the same supplies, just different colours and technique. I started with a panel of card stock painted with some gesso. I decided the card above was stronger, so I entered it as the one for publication instead. That's the great thing about crafting! You can try different things to see what results you get. It's a fun way to learn.


Please be sure to check out Jill's blog and post to see her take on these cards. She creates amazing things! She is currently on the MFT design team and creates stunning cards every week that are inspiring and get your crafty blood pumping. Be sure to stop by her blog to say "HELLO Wonderful," to her!!

Thanks so much Jill for being my special crafty friend! You make me smile and give me the urge to bust out my ink and stamps. A girl couldn't ask for much more than that! God bless you, friend....

Thanks so much for stopping by today. I hope you have a great week! Get craft and do something special for yourself. I hope amazing things are in store for you, starting with today!

Until next time,
xoxo
k

Jan 15, 2015

Simon Says Stamp Wednesday Challenge

Welp, tis no surprise that I missed the challenge AGAIN! Man, the week just goes by so fast for me! BUT I am happy to say that I did make a card. Which really is the first hurdle. It was just the posting of it that threw me. So without further ado, here is my Simon Says Stamp wednesday challenge card:


The challenge was to use Simon Says Stamp exclusive products. I chose this cute stamp set and die cuts that came out late last year. I'm embarrassed to say this is the FIRST time they have seen ink! I also used the waves stencil with embossing paste and distress inks for my bowl water. I popped everything up using dimensionals and added some Wink of Stella over the water for some added shimmer.


Here is a little close up peek.

Thanks for checking in today. It's been kind of a hectic week. One of those where you say, "How is it ONLY Wednesday?" Cause you feel like you have already lived three weeks in one. I guess I could pretend it is Wednesday three weeks from now?!! That may just work ;)

Thanks for stopping in. I love's you!
xoxo
k


Aug 16, 2014

Celebrate with Tim Holtz Stencil


Hey, Howdy HEY!  Happy weekend to you all.  I picked up this new stencil by Tim Holtz called 'Doily'. I was wandering the isles of my LSS (danger Will Robinson!) and WHAMO! It smacked me right between the eyes and begged to be carried home. I could only oblige. 

Check it out:


I wanted it to create a vintage-y, lace-y feel so I opted to use embossing paste tinted with some Fine Linen ink by Papertrey Ink.


It looks amazing after you peel it up. Do any of you gasp when you stencil? I LOVE the reveal! Makes my heart jump.
Ok, well, I couldn't quite let 'er be, so I decided to sprinkle a little bit of  Liquid Platinum Embossing powder over the top.  But I was sad to lose the linen colour so I opted to not completely cover the entire panel.

And really, it's hard to see the linen colour still, so I am happy to know that no matter which way you go (embossing or NO embossing) this stencil will make your project look great!

I had these Rosie Posie flowers from Papertrey Ink stamped up and sitting on my desk. I have this special place I put things that I think I might actually use on something else. They are always in the way! And thank heaven, these flowers only sat around for about 2 weeks before being used! That's actually a record. Usually they waste away. I have this unsightly stash of things stamped/cut/blended/stenciled that need to be put to use. I think I will try a card a week using up my stash and if these things are not gone in a few months, then out with them!!


Ok... Last but not least, the matte copper card stock you have seen before and of course the Little B die cuts. I love both of these things! You will be seeing much more of them I am sure. 

Being out of the states, I am getting creative about where I find my crafting supplies and also much more flexible about what is deemed a 'crafting supply'. I would have never thought to look at the poster board section before. Which now that I think about it, is just plain silliness. It is paper, after all. But I am so glad I did! The copper was such a lovely find.

Thanks for stopping in today. And thanks for all your comments! You always make my day!
have a smashing weekend,
xoxo
k

Aug 13, 2014

PTI Make It Monday #176


Hey all! Just stopping in to share a quick card. I got a chance to participate in the Make It Monday challenge over at Papertrey Ink this week. You can check out the challenge HERE. They are in the middle of a release and things are looking purdy good over there. Oh, my poor bank account!

Ok, this weeks challenge is hosted by Laura Bassen and is all about embossing paste backgrounds.

Meet the card:

I made a stencil using a PTI background die cut and shaded my embossing paste with three different shades of yellow and orange.


The thing about embossing paste is you can't stamp a sentiment on it, but also you hate to cover up the background with an actual panel of card stock, so enter in: Vellum!!

I have been in love with vellum lately. Maybe you have noticed? It looks so great especially when heat embossed. Its versatile and lovely! I stamped my sentiment and bee and then heat embossed it. Colored in the wings with some yellow Copics and Wink of Stella and then added a button. On the sides I added some score lines for a little interest but in this photo, you really can't see it! So oh, well.

That's all for today. I'll see you later this week with more fun things to share.
Thanks for stopping by!
xoxo
k


 photo copyright.jpg
envye template.