Oct 29, 2014

The Card Concept #22

Hello there, and good morning to you! Today is the day... another challenge over at The Card Concept!

Here is our inspiration photo:


And here is my take on the challenge. 


This week we were told to create in whichever style we wanted. When I first read that, I just stared at the computer for awhile. I think I may have even rubbed my eyes a few times. I was totally stumped at what to do!

What I decided to do was to NOT pick a style first, but just create something and see what happened, and THEN I would put it in a category. I guess you could say I still don't know what kind of style I gravitate to... But anyway, this is what came out. A simple, Clean and Layered card. SO that must be it!

I stamped my sentiments and leaves first and then cut it up into three strips. I had some of these left-over red inked strips that I put in between the white strips which are popped up with dimensional foam. I embossed my card base with  a checkered pattern and added some gold sequins. Pretty simple!

 I hope you get a chance to sit down in the next two weeks and create something fun for this challenge. I love looking through all the links. You all have so many great ideas! It's a great way to get inspired and learn about new carmakers out there. I can't wait to see what you create! Be sure to stop by The Card Concept  BLOG and like us on FaceBook for some inspiration and challenge reminders through out the weeks of each challenge. 

Thanks for checking in with me today! Until next time... just keep on crafting
xoxo
k

Oct 24, 2014

Lawn Fawn: Happy Hanukkah!

Hello there! I bet you didn't think you would be seeing me again so soon, eh?  Well, it seems Lawn Fawn is having a little contest to fill in a few spots for their Facebook team and I thought I would give it a go! I made this little guy up just for the occasion:


There is something lovely about white embossing paste on white card stock. I do love it. What about you?!  I used the Stitched Journaling Card die cut from Lawn Fawn and their Happy Hanukkah set.

I heat embossed the menorah with gold embossing powder and stamped the sentiment in blue. I also have a PLETHORA of ribbon from when it was all the rage (remember that!?) Well, I figured a little ribbon treatment would be ok. You know, it still has its place, I think (besides sitting in my drawer!)

That's it for now. Very simple card. It pulls together fast but has some details that make you happy. That's the kind of card I like!

Thanks for stopping in today to say hello! You can check out my Facebook page HERE and you should stop by the Lawn Fawn Facebook page too.  Have you seen the listing for the design team spot? You can see it HERE.  See if you want to take a crack at the contest yourself!

Until next time....
xoxo
k

Oct 23, 2014

Where have I been? I've been Missing YOU!

Hey there crafty peeps! It's been awhile. Nay, I dare say it's been forever!! I kind of went quiet there, but for good reason. I have been gone. 

Can you guess where?:


A good friend and I took a quick weekend trip to Bangkok! We ditched our kids (and hubbys too) and took a break. Bangkok is amazing. As I am sure a lot of you know. We had a great time. I won't bore you with my travel details but will show you a few things I saw along the way. 


Each time I visit a (predominantly) Buddhist country I learn so much more about their beliefs. I dare say its one of my favourite religions.  We saw so many amazing Buddha statues. This following one is just about the biggest one I have seen. (The other one is in Myanmar). We had a great time and it was nice to shut down for a bit. The internet was spotty so I didn't really know what was going on elsewhere. But now I am back, and jumping in again!


So today I wanted to share a little card with you that I made to submit to publication. It didn't get picked up which means I can show it to you!

I started with a water-colour paper and heat embossed this Lawn Fawn image onto it.

Next came the distress inks and water brush.

Then came the card!!

I used some gold metallic paper to mat the white paper. I wanted it simple because all the stuff going on. With colours and little images, you can't go crazy everywhere else on a card.

I added a glossy heart to my home state of Utah. Which of course, is where I am missing all my family! It was also super convenient that the heart just *happens* to balance out the look of the card. Don't you think? If I put the heart on NY (which is where we moved from, and I miss terribly too!) It wouldn't look as good. It would have covered up all of the state! Anyway, just a little peek into my crafty brain. ya?

Ok. That's it for today! Thanks for stopping in and not giving up on me while I have been gone :)

Be sure to check over at CutCardStock.com for my little home decor post going up later tonight. And of course there is always some thing else going on, so be sure to check back in for some Sweet Stamp Shop and Paper Wings Productions all which are coming next week.

Until next time...
xoxo
k

Oct 17, 2014

Sweet Stamp Shop: Thinking Of You

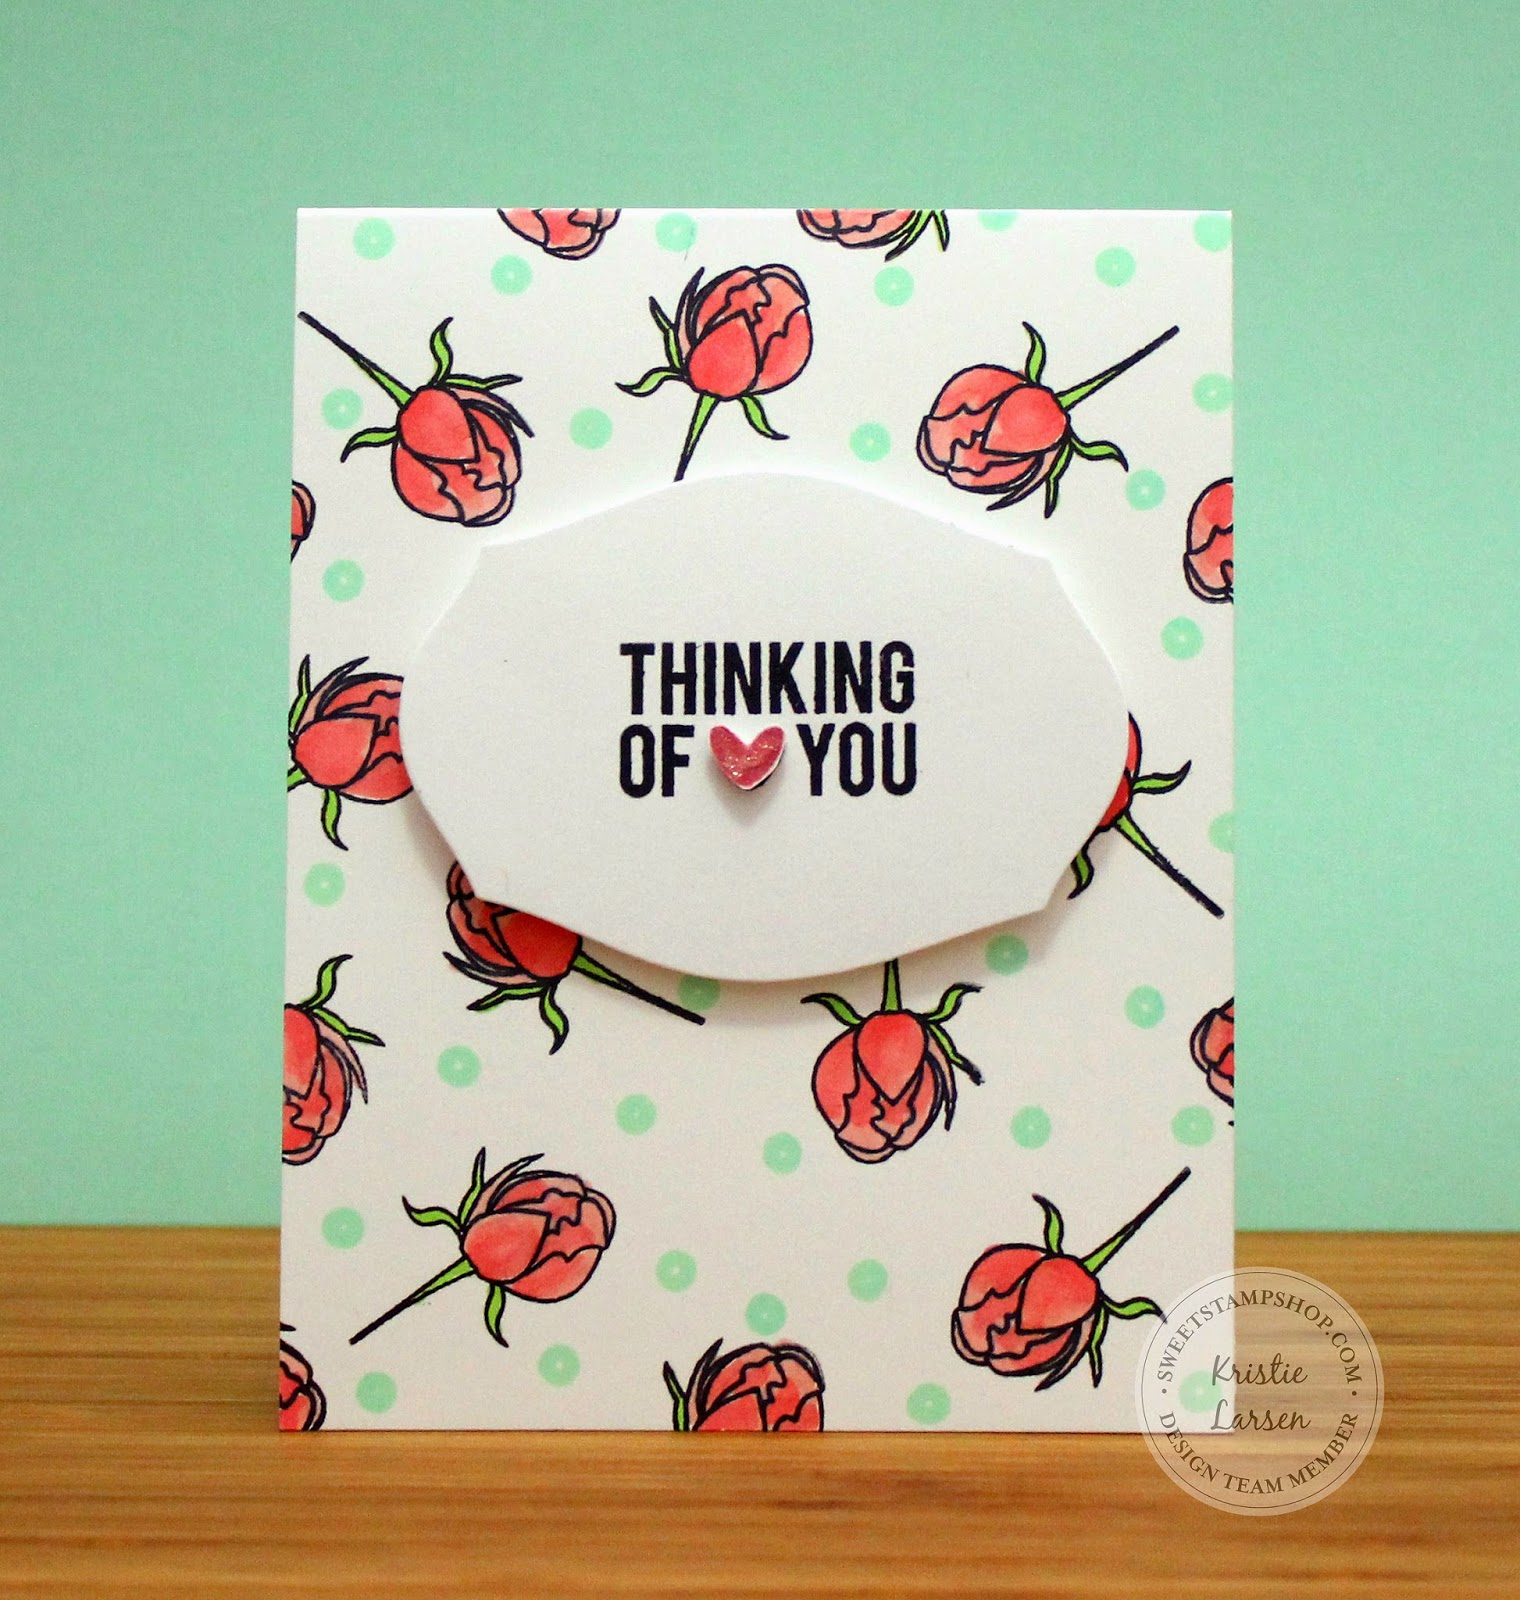
Hey there, Fancy Pants! Welcome to the 'ol blog! Today I am sharing a new card from Sweet Stamp Shop. 

Here she is:


One of the things I LOVE to do is create my own stamped backgrounds. I bet if you looked in your stash you can find a few things that work together to make your own amazing stamped background. These two sets put together made up this sweet background. I wanted to go for a kind of floral fabric look.


The sequin stamp is from the Bling stamp set and the flowers are from Elegant Flowers set.  I colored the flowers with Copic Markers and then added the sequins in Mint Julep ink by Hero Arts.

I die cut my sentiment medallion and stamped my image from Condolences stamp set.

It was a really easy card to come together. Remember, if you want to stamp a background, be sure to space your big images out first and then add the little images in after. That will help you with balance.

Thanks for stopping by today! Did you get to check out the new release? It's pretty fan-fabulous! Be sure to click HERE If you haven't seen it yet. You can see it in all its glory!

Until next time....just keep on stamping!

xoxo
k

Oct 15, 2014

The Card Concept #21

 Hey there! Welcome back to another instalment of  The Card Concept! Here is today's challenge: Country and Sunflowers!

My charge is to make a Shabby Chic card and let me tell you, this was a challenge for me! I have noticed that my clean and graphic style has become such a mainstay that it was hard to venture away from it. And even with all that I did, I don't think this is as Shabby Chic as it should be! But you be the judge:

There are a few things that mean Shabby Chic to me. First, ribbon, layers and antique sponging. I started with some book print that I painted with some white gesso. I stamped my flower image (the closest I have to a sunflower, eek!) and used some Copics to colour it in. Now just a little FYI... If you decide to colour Copics over paint, you must remember that even if you use the right ink, your stamped image will take some time to dry on the paint. So be careful! You may get some smearing if you colour too soon (um, I learned first hand). But one of the other things about colouring with Copics on paint is it does this cool blending thing. Kind of splotchy, which I liked.


I die cut my scalloped rectangle (in my world scallop is a nice country style!) and sponged it with distress inks. I stamped my image and popped it all up with dimensionals for each layer. I was inspired by the gingham in the picture and wanted to add some of that to my card.

And that's it! I think it's still pretty simple and plain for a shabby card, and I realized my stash is not equipped for shabby designing! But I feel like it went fairly well.

What do you think? Will you join us for our challenge? I love The Card Concept blog because its a great chance to try new styles. Because honestly unless someone pushes me, I don't think of designing in another way. And this always helps you hone your designing and adaptation skills!

I hope you get a chance to join us. So hop on over! The Card Concept.

Thanks for stopping by today. And thank you for taking the time to leave me some comment love! It makes my day!
xoxo
k

Oct 13, 2014

Sweet Stamp Shop October Release

Welcome to the Sweet Stamp Shop's New Release!! YAY!! You are in for a real treat today. Nicole has some amazing things up her sleeve.  This month you can look forward to some holiday action , monsters and some planner stamps! How many of you are into planners?? A lot of you, I know! Nicole's new stamps will have you organised in style! You won't want to miss it. In fact she had a bit of a pre-release with those planner stamps and they sold out in ONE DAY! So be sure to check in fast to get your own.

I created some samples for today's release. Take a look

Behold., my Christmas tag. Dun, dun, dun, duuuuun...

I know, super simple. In fact, simple enough you could make these up for every gift you have to give this holiday season. I know you will have people saying, "What! You made this!?"   I know, that always feels so good, right?

I coloured my little Christmas house with Copics, but I wanted it to seem like it had stone walls so I did a few different layers. Starting with a base of T1 grey then dots in T4, shown here:


Then dots of T6:

Then I washed over it again with T1. It worked... sort of :) I used some sequin stamps from the Bling stamp set for my falling snow and popped the house up in the corner. Then added a Merry Christmas sentiment from Just the Basics. I used a white gel pen to colour the snow drifts. The gel gives it some dimension which is kind of nice.


Next up I used the new Fall Leaves to make up my fall wreath:


I found this sweet little wreath from my dollar store (and actually its a $2 store here in Singapore ;)


I then laid out my leaf images and coloured them in a variety of fall colors. I thought I would need the brown, but once I laid them out on the wreath I quickly realized the browns were too close, so the leaves kind of got lost.

 I fussy cut out the leaves and laid them out on my wreath. I used hot glue to adhere them into place.

I added my fall sentiment and coloured it with Copics. I used some distress inks to soften the look a bit and added some Glossy Accents over the letters. I wrapped the top with some ribbon and then tied a gold button on with some hemp twine. I curled the twine around a pen to give it a little curl.


And that's it! The new release is out everyone so head on over to the BLOG for some highlights from the other designers and also don't forget to head over to the SHOP to pick up all the must haves for your stamp stash!

Thanks for stopping in today. I hope you enjoy the inspiration today! Let me know what you favourite projects are. I would love to hear from you! And be sure to stop back in a few days for another Sweet Stamp Shop creation!

Until next time... keep on stamping!
xoxo
k

Oct 8, 2014

Halloween Banner

Hey there! Today I am over at CutCardStock.com sharing my Halloween Banner project. 

Here is a little teaser:


I just purchased some black embossing paste and I think its divine! Jump on over and check it out: HERE

Thanks for stopping in today! I've been running around like a crazy chicken. School year is about to end which means no more running up to school and over to tutors and crazy stuff like that. Maybe I will have more time to sit and say hello!

I will be back next week with some more Sweet Stamp Shop so be sure to visit again!

Until next time
xoxo
k

Sweet Stamp Shop: Sink or Swim

Hey there crafty peeps! Welcome to a new week! Thanks for joining me today. I have a little Sweet Stamp Shop card to share with you. 


I used a few sets for this one. First off the main sentiment panel and the life preserver cards are from the Ahoy card kit. Which, between you and me, is my favourite kit! I love kits because they make designing cards a breeze. But I always have to add some details to them or I don't feel satisfied with the card making experience. I want to get in there and get crafty, using a few different things. Not just cards and dimensionals. But, what card kits DO is give you a great jumping off point so you don't have to hit your head on the wall trying to come up with something! That saves me loads of time and headache.

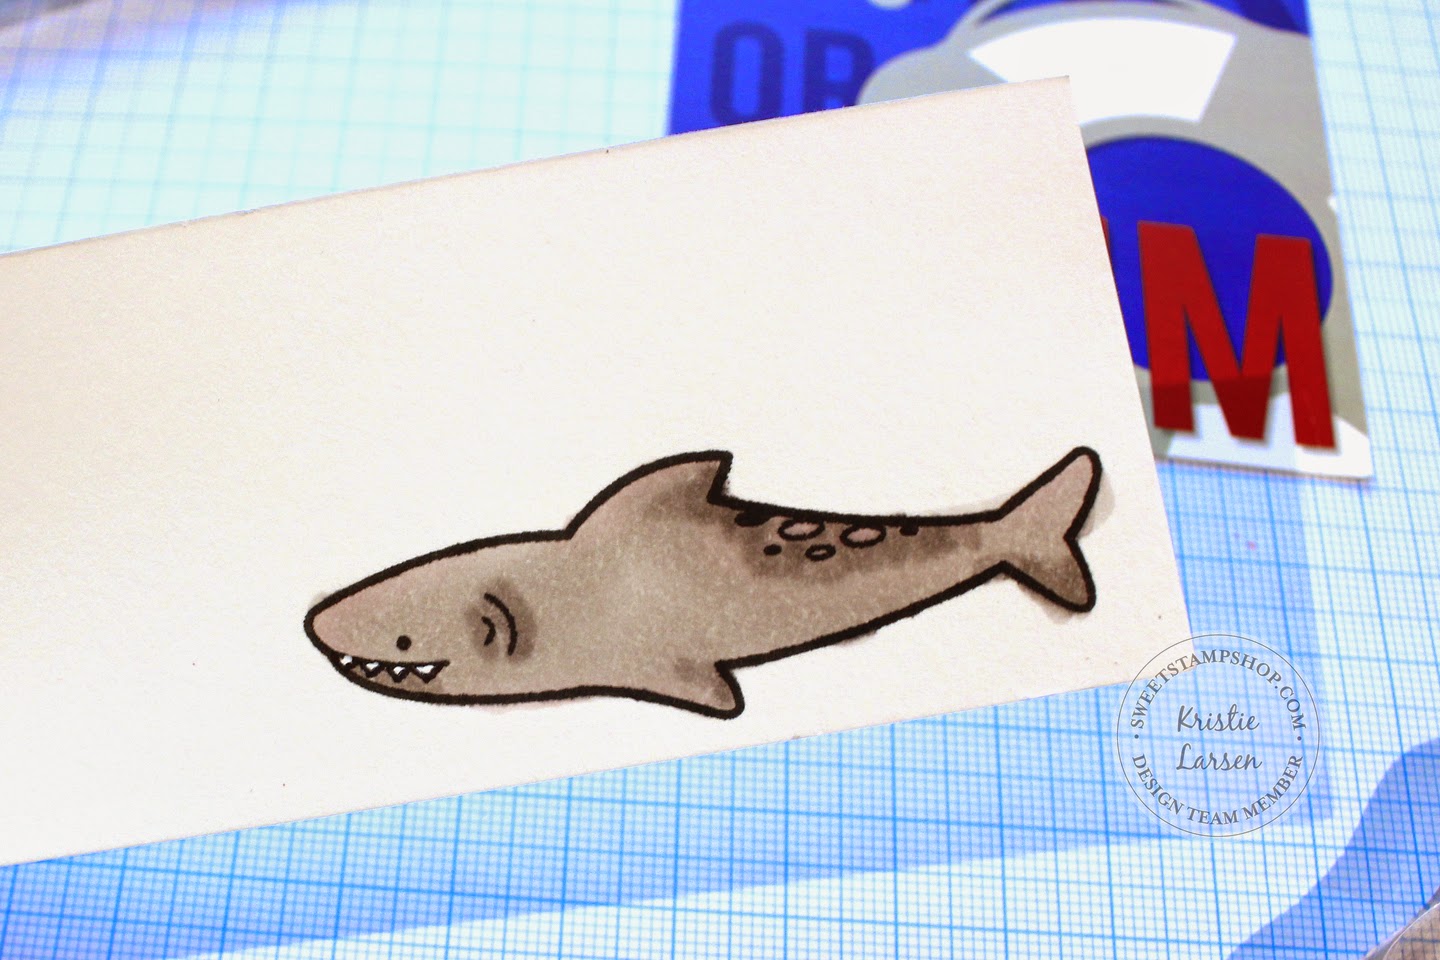
After choosing my sentiment panel, I stamped this shark from the FISHY set. I colored him with Copic markers, but I wanted his teeth to be really white, so I used this Uniball white gel pen from CutCardStock.com to add a white dot to each of his teeth. I like how it helped them pop out a bit. Makes him more menacing, right?


Next, I went along with the design of the card panel and added some glossy accents to the already designed water bubbles on the card. This just adds a little bit of dimension to what might be a flat card. Not that flat is bad, its just I like some texture here and there.  I also matted the sentiment card on white card stock (also from CutCardStock.com) and popped the entire thing up with deminsionals.


Once I did that, I felt like my card was a little too blah... It needed a bit of something... I didn't know what. Until BAM! It hit me... I needed another colour. What you want to watch for with designing is making sure you have contrasting colours. Already my card was really matchy-matchy with the red, blue and grey. All of the same colours really flattens out your design.  I decided I wanted to add a hook to my fist and thought this anchor would do the trick. And Voila! In one stamp I added a new colour and a new detail. Plus this anchor gives extra opportunity for texture because you can tie some twine through it too. I knotted it and unraveled the ends a bit.


And one last detail... I added the wave stamp from Fishy across the bottom of the word "swim". I felt like it added something nice and simple. You don't really notice it that much until you look at it and then say, "hey! I see what you did there!" I kind of like it like that ;) Ok, and that's it! My card is complete... I thought this might be a funny card for someone who's just started a new job, or maybe even a graduate? Would that be totally freaky to them? Maybe it would make them nervous. That would be horrible! I was trying to think of a good sentiment for the inside and could only come up with "Good Luck." So I guess it would work in a lot of different occasions. But definitely not a wedding card though! HA!


Thanks for joining me today. Be sure to check back next week because the Sweet Stamp Shop October release is happening on the 13th! So be sure to stop over at their BLOG for all that goodness, as well as here for my projects too! It's A gonna be fun!

Thanks for taking a moment to come visit me. It always makes me smile ;)
Until next time!
xoxo
k

Oct 4, 2014

WCMD and Sweet Stamp Shop

Happy World Card Making Day....again!! This is my second post for the day so if you have come to visit, be sure to scroll down to the other post and stay awhile!


Today Sweet Stamp Shop is offering a little WCMD freebie for you! It is so cute, that I am sure you will love it. I used him and some new images (soon to be released) for my card today. 

Take a look:

Just a little side note, I drew out my rectangle in pencil using my T-ruler, before going over it with a black marker. I stamped my sentiment where I wanted it to go and then drew the black line. I erased any pencil marks after I was done.

I cut out some extra eyes and popped them up on my monsters. I also covered them all with glossy accents for a bit of oomph!

Next up (no, I could NOT make just one card with these little guys!) I got this black embossing paste in the mail, just in time. I love white paste, but I have been wanting to try it in black and it's kind of a pain to mix it yourself. I figure a bottle of white AND black is all a girl needs. I can mix all the other colours in-between, right?  Well, I think I was right because I am so happy to have it in my arsenal!

I applied it to my stencil, and this is how it came out. I like it! 

I die cut a circle out of it to make a little peek-a-boo card. I put the monster and the sentiment on the inside of the card and left the polka dots to the outside.

I love his mean little face... I think I need to make up a whole slew of these cards for the next 15 years while my kids grow. There are days I can be a mean-y face! Of course I regret it and I have to apologise. But this would be a great way to do it. I am sure they would appreciate it!

Ok! That concludes all my WCMD cards! I hope you enjoyed them. Thanks for stopping in. Be sure to stop by the Sweet Stamp Shop blog to get your own freebie and take a look at all the other inspiration. Just prepare yourself, this next release is going to be a good one (um, they all are, aren't they!?)  

Until next time...
xoxo
k

WCMD and CutCardStock.com

Happy World Card Making Day to you!! Today is extra special for us paper crafters... It's the one day were we have a legit excuse to shut down everything in life and make a card! (even though I take every excuse I can, regardless of the day... just saying')

I used up some CutCardStock.com products for my card today. Here is their basic black card stock, stamped using some Hero Arts white ink. I LOVE this stamp (also by Hero Arts)


Isn't it striking with white on black? Mmmm, my favourite.. I chose some flowers by Jane's Doodles. I love these flowers too. In fact, I'm new to Jane's Doodles stamps, but I really like what she has there! You should check it out.

CutCardStock.com has a plethora of envelopes you can buy and I just happen to have some to work with. I chose these gorgeous black ones to make up a matching envie with my card. Mostly because I can not help but stamp this gorgeous image over and over again. Can you blame me?

I made up a little die cut tag using the same flower image but a different sentiment (Avery Elle). I added some sweet, heart enamel dots for a finishing touch. The envelope is kind of a nice thing to add to a present or even to get in the mail! I think you could easily add the address to a sticker on the back and mail away.

You can check out the specials going on right now over at CutCardStock.com. They always have something to catch your eye. And I hope you enjoy your World Card Making Day!

Tell me, are you making a card today? This is the first year I have actually remembered the day and participated in some card making magic. And I am glad I can. I hope you can too!

Thanks for stopping in today. I will be over at CutCardStock.com for a post next week as well as a here for a personal post featuring more Sweet Stamp Shop love, so be sure to stop in again next week!

Until then... just keep on stamping.
xoxo
k

Oct 3, 2014

Paper Wings Productions: October Blog Hop


Hey there! Welcome to another great Paper Wings Productions blog hop! 

If you are here from {Erica's} blog you are in the right place! If you are just stopping in to say hi to me today, be sure to start {HERE} at the beginning to read the rules and get started! This months blog hop is all about the colour Black. My favourite!!

And remember ONE lucky winner will get a $25.00 gift certificate to the Paper Wings Productions online store.

For a chance to win all you need to do is:
  • Be a follower of the Paper Wings Productions blog, The Aviary
  • Visit each of the participating designer's blogs and leave a comment!
  • go back to the Paper Wings blog and leave us a comment there telling us you completed the hop.
To increase your chances of winning you can like their Facebook page and/or invite your friends to the hop. Be sure to leave a separate comment for each of your additional entries. The winner will be announced on Tuesday Oct. 7, 2014 at The Aviary!

Ok... here she is:


So, I have always loved black. Since I was a teenager. In fact until I moved to Sinapore, my entire wardrobe consisted of black, white and greys. (Of course I lived in NY, where those colours are the only ones necessary ;)

I wanted my card to be bold! I chose one stamp and the masking technique to create my card. I think when you use black and white, you don't need to be fancy. The stamping will do the work.
I started with my supplies. I chose one image from Sacred Geometry stamp set. I created 6 masks so I would have plenty to work with.

I started with making a line directly in the centre of my A2 card base. This t-square has changed my crafting. I highly recommend having one!

 I started stamping in the centre and worked my way out on the line. Then created 2 more lines of stamping using my masks to cover the circle I had stamped previously. There isn't much left to this card. You see how the intricate stamp takes control of the entire design. You really don't need much more to make it a great card.

Once I was done with three lines I thought it enough. I wanted to leave some white space above and below the stamping. I added a simple die cut sentiment and a gem and call it done!

And here is the card, one more time:

A simple card with a simple statement. Kind of like the colour black to me... simple but striking. I love it!

Thanks so much for stopping by today! 
***Here is the line up in case you get lost and need to find your way:

Kristie (thats Me!)


Until next time...
xoxo
k


 photo copyright.jpg
envye template.